|
| EWD Projects :: Oldschool |
|
|
|
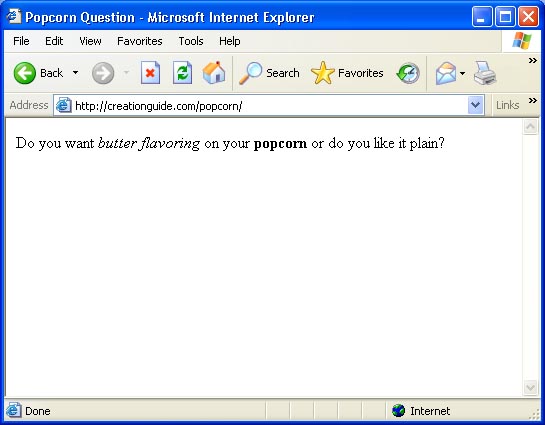
Demystifying Basic HTMLUsing HTML TagsPrint This Procedure ( doc :: pdf ) In this section, we introduce the basic rules of HTML along with a few common tags. Keep in mind that this section does not define every HTML tag out there; quite a few HTML tags exist, and plenty of books devoted to HTML provide comprehensive command lists. Our philosophy is that if you learn the basic rules of using HTML tags, you’ll be able to use any of the tags you discover online or in HTML books. Let’s start our discussion of HTML tags with a simple rule: HTML tags consist of commands that appear within angle brackets (<>). For example, one of the first tags in a Web page’s source code is typically <html>. This tag tells a browser right off the bat that the text document is an HTML document. The browser knows that any text within angle brackets (<>) is an HTML command that needs processing and that all text outside angle brackets (<>) is content that needs to be displayed. lingo Source code refers to the contents of the HTML document that creates a Web page. Most browsers enable you to view a Web page’s source code. For example, to display a Web page’s source code in Microsoft Internet Explorer, display a Web page, click the View menu, and click Source. Here’s the second rule you need to remember: HTML tags are not case-sensitive, although XHTML tags must be lowercase. This rule isn’t earth shattering, but it’s convenient to know. It means that browsers don’t care whether the HTML text between the angle brackets is capitalized or lowercased. Therefore, when you use HTML, <STRONG> and <strong> are essentially the same tag (which, incidentally, is a tag that instructs the browser to display the text following the tag in boldface the deprecated tag for boldface is <b>). Similarly, <HTML>, <html>, <HtMl>, and any other combination of capital and lowercase letters represents the same tag. Of course, with that said, we encourage you to use lowercase to comply with the latest standards. Here’s rule number three: HTML tags almost always come in pairs. Because most HTML tags are used primarily for formatting purposes, HTML tags often come in twos a starting tag and an ending tag (also referred to as an opening tag and a closing tag). This pairing enables you to tell browsers where a particular formatting attribute (such as boldfacing) should start and where it should end. Think about when you go to the movies with a few friends and two friends go in to save seats while the rest of the group goes to the concessions counter. The two people saving the seats sit separately at each end of the saved seats to mark a span of seats that will contain the friends. If the seat-savers were HTML tags, they’d tell the browser that all the seats between them should be formatted as their friends’ seats. Starting tags and ending tags have very specific purposes namely, a starting tag indicates when an action should start, and an ending tag indicates when an action should stop. (See, we’re not talking rocket science here!) While starting and ending tags appear very similar they have a minor, albeit critical, difference. Ending tags are differentiated from starting tags by the inclusion of a forward slash (/) just after the left bracket, like this: </html>. The last element in HTML documents is usually the </html> command, which indicates the end of the Web page’s display. Going back to the movie theater example, let’s say that one seat-saver is sitting in an aisle seat and the other seat-saver is sitting in the middle of the row. The seat-saver sitting in the middle of the row is wearing a red shirt. Suddenly, a new arrival asks the seat-saver sitting in the aisle seat whether the seats are taken. The aisle-side seat-saver would say something like, “Yes all the seats down to the person in the red shirt are taken.” That’s the role of a starting tag. The red-shirted seat-saver serves as an ending tag. For example, a <strong> tag tells a browser, “Please boldface all the text between me and that </strong> tag over there.” tip A common error in HTML coding is to forget a closing tag. When this happens, the browser is never told to stop processing a command. For example, if HTML code tells a browser to start bolding text (<strong>) but doesn’t indicate when to stop bolding text (</strong>), all text on the page will be boldface after the opening tag. For further illustration, let’s look at an example of text that uses HTML tag pairs. The following sentence includes HTML starting and ending tags that format the sentence as a paragraph (<p></p>), display the phrase butter flavoring in italic (<em></em>), and format the word popcorn in boldface (<strong></strong>), as shown in the figure: <p>Do you want <em>butter flavoring</em> on your <strong>popcorn</strong> or do you like it plain?</p>
Viewing the formatted question in a browser The popcorn sentence also illustrates an interesting concept called nesting. In HTML documents, nesting has nothing to do with twigs and feathers and everything to do with the order in which HTML tags appear. In the popcorn sentence, the italic tag set (<em></em>) and the boldface tag set (<strong></strong>) are nested within the paragraph tag set (<p></p>). Here’s a key rule you should follow when you’re nesting HTML tags: Nested HTML tags should close in the reverse order in which they open. That rule might seem a little confusing, so let’s look at an example. Basically, opening and closing HTML tags shouldn’t get their lines crossed. Here’s a correct pattern: <html> <p> <strong> </strong> </p> </html>
In this example, the <strong> (boldface) tags are nested within the <p> (paragraph) tags, which are nested within the <html> (document identifier) tags. This setup would result in bold text within a paragraph within an HTML document. The following setup would also work: <html> <p> <em> </wm> <strong> </strong> </p> </html>
Notice that this nesting example uses the same pattern as the popcorn sentence. In this example, the italic tag set and the boldface tag set aren’t nested inside each other, but both tag sets are nested within the paragraph tag set. Now let’s lighten up the discussion a bit and look at a more clear-cut rule: By default, HTML documents display a single space between text elements. This rule might seem odd to mention, but spacing issues are a great concern on the Web for a number of reasons (mostly because designers often have to deal with content that resizes and reflows issues that are nonexistent in printed documents). In an HTML document, adding any number of spaces within your code by using the spacebar, Tab key, or Enter key results in a single space. Therefore, you could embed the following four code snippets in an HTML document: <em>Music Instruction</em> <em> Music Instruction </em> <em> Music Instruction </em>
and the text will appear in a browser window as shown here:
Viewing how text displays with a single space between words, even when extra space is added between words in the HTML document Now you’re ready for the next rule, which adds some spice to HTML tags: Some opening HTML tags can contain properties (also called attributes), which further refine an HTML tag’s instructions. In other words, you can frequently customize the instructions related to an HTML formatting command. For example, you can add a color attribute to the <span> tag to change the display color of text, like this: They say the <span style=”color: green;">grass</span> is greener.
If you inserted the preceding sentence into an HTML document, the text would display the word grass in green. Finally, here’s the last rule in this section: Numerous variations exist when it comes to the HTML nesting theme, properties, and use of tag sets. As with all rules, you’ll find that although most of HTML is predictable, the technology is as consistent as spelling rules, which means that you’ll frequently find exceptions to the rules. For example, if you want to add a line break in HTML, you enter <br />. There’s no closing tag for a line break you either have a line break or you don’t. Similarly, you insert a horizontal rule with the <hr /> tag; again, no closing tag required because the closing forward slash is included in the tag. Don’t worry if you’re feeling slightly confused. You’ll start to get a feel for HTML as you work through this walkthrough. There’s nothing like hands-on experience to gain knowledge. We’ll introduce you to additional HTML tags and concepts in the walkthrough as we go. For added assistance, you might want to keep the following handy while you work: HTML Tags Used in this Walkthrough
|
|||||||||||||||||||||||||||||||||||||||||||||
 |
|
|||||||||||||||||||||||||||||||||||||||||||||