|
| EWD Projects :: Chapter 7 |
|
Chapter 7: Posting a Web Site within an Hour (or so)Composing a Blog EntryWith your profile whipped into shape and presiding over your MSN Space, you’re ready to add content. Let’s start with the most popular content module, the Blog module. The Blog module is where you post entries to your online journal. Adding a blog entry doesn’t take much technical know-how. In fact, the biggest effort lies in actually typing your content. Creating a blog entry requires the following three main steps: 1. Open your MSN Space, ensure that you are signed in with your .NET Passport (the Sign In button in the upper-right corner should change to a Sign Out button when you’re signed in), and click the Edit Your Space link below the Sign Out button. 2. In the Blog module, click Add Entry. The Edit Blog Entry form is displayed. The date appears by default. Type a title, select a category (if desired), and enter the text of your blog entry. The following figure shows the Edit Blog Entry form with a title, category, and text entered.
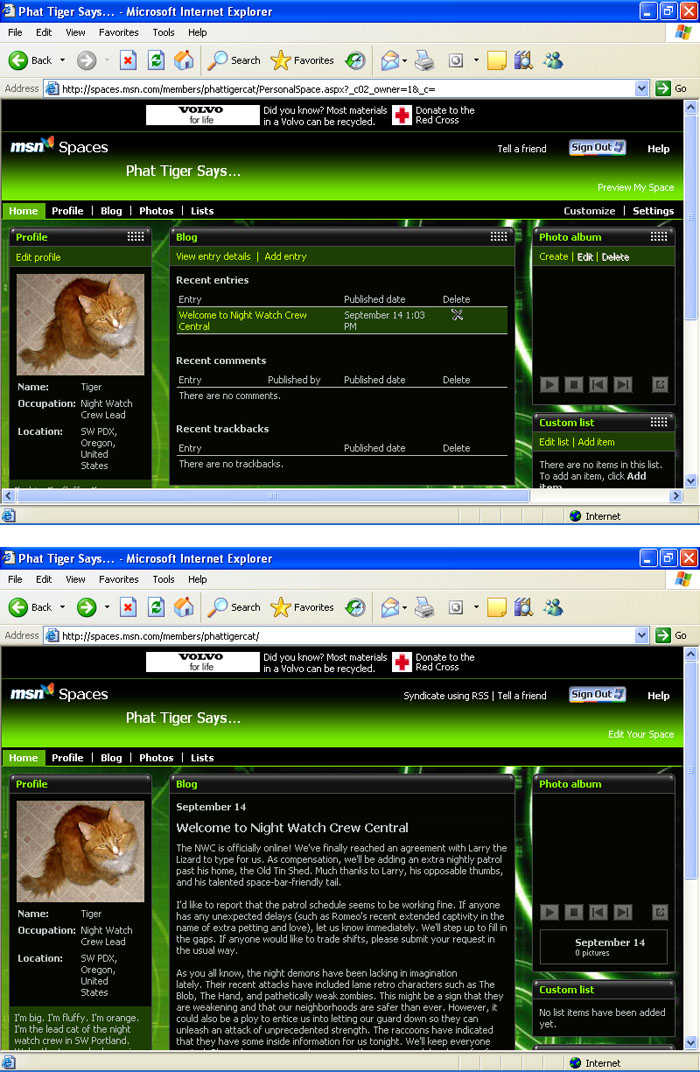
The Edit Blog Entry form tip Currently, the Edit Blog Entry form doesn’t offer a spelling checker. Therefore, you might want to copy your blog entry’s text into a blank Microsoft Word document before you publish the entry so you can check your spelling and correct your grammar. Also, always click the Preview Blog Entry tab before publishing your text so you can review your words one last time before sending them online. 3. Click Publish Entry after you’ve checked your spelling and previewed your text. After you publish a blog entry, your Blog module shows the entry. To view how your entry appears online, click the Preview My Space link (below the Sign Out button). The following figure shows the Phat Tiger Says… blog entry in Edit Your Space and Preview Your Space views.
Completed blog entry in editing and preview modes |
||
 |
|
|